Last Updated on: 23rd April 2024, 11:28 am
Have you ever wanted to create a post for your business but found it too time-consuming? If so, then Simply Be Found has the perfect tool for you.
Creating a post for your local business on social media can be tricky. You want to get the word out about what you do, but you also need to ensure that your message is clear and concise so that people will understand what it is you are trying to say.
Luckily, there are many tools available that allow businesses of all sizes the opportunity to create compelling posts with minimal effort. One such tool is Simply Be Found, which helps users who have no previous experience to create a post for their business in an easy-to-use platform.
The way people search and find information has changed drastically over the years. If you are running a small business in your community, you must take advantage of all available resources so that customers can find what they need when they need it.
Simply Be Found has helped thousands of local businesses find new customers and grow their businesses in almost all industries.
This article will show you how to create a post using Simply Be Found, a platform designed for businesses looking to create more effective posts than the standard Facebook update.
Simply Be Found allows you to choose from different templates and features proven to get results. It also provides analytics to see which of your posts has had the most engagement and clicks.
Guide on How to Create a Post Using Simply Be Found
Here is a step-by-step guide on how to do that:
1. Log in to Your Simply Be Found Account
Use your registered email address and password to log in to the Simply Be Found marketing platform.
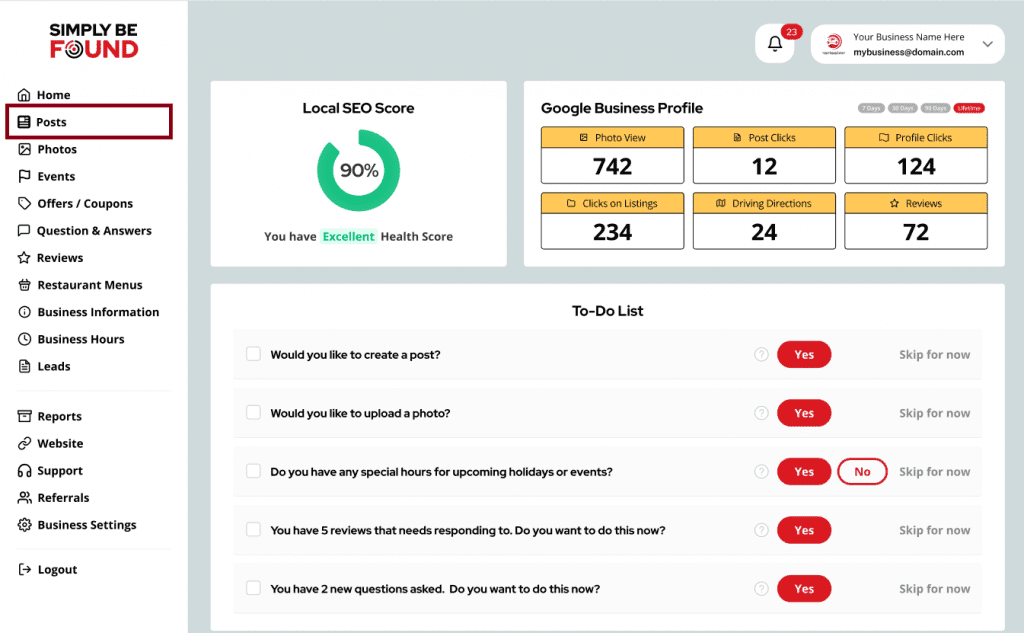
On the left side panel of your Homepage, select “Posts”. This will at once load the Posts Page on your screen at.
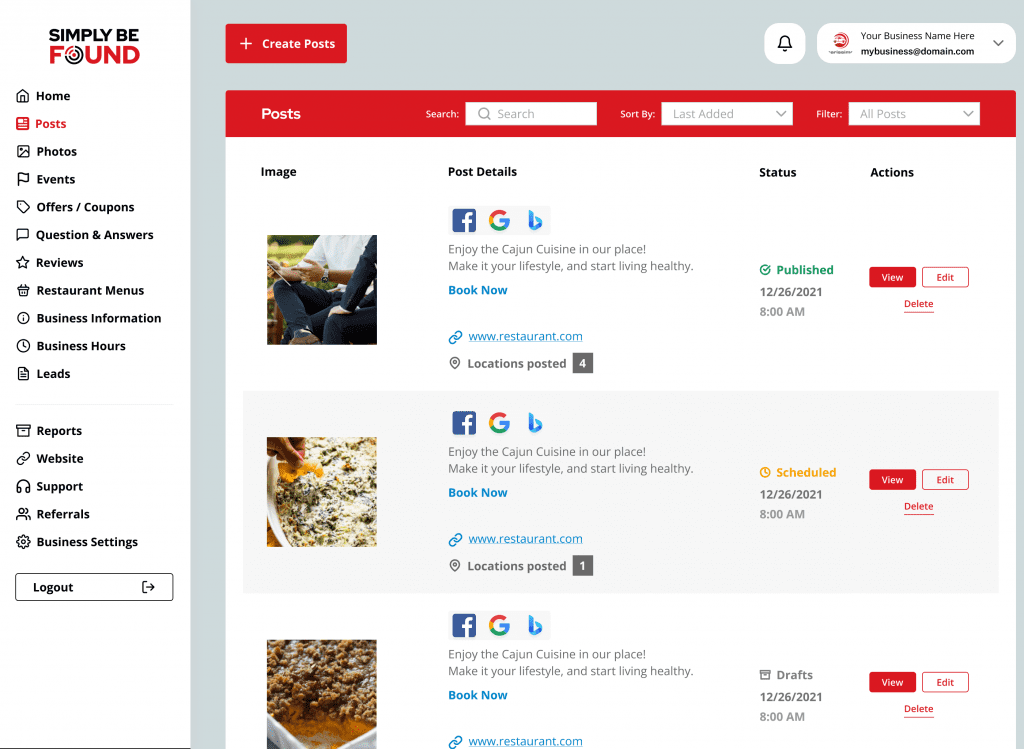
2. “Posts” Section
In this section, you can view all your published posts, drafts, and images attached to your posts. In this tutorial, we will break down each of its functions below.
3. Add a Photo
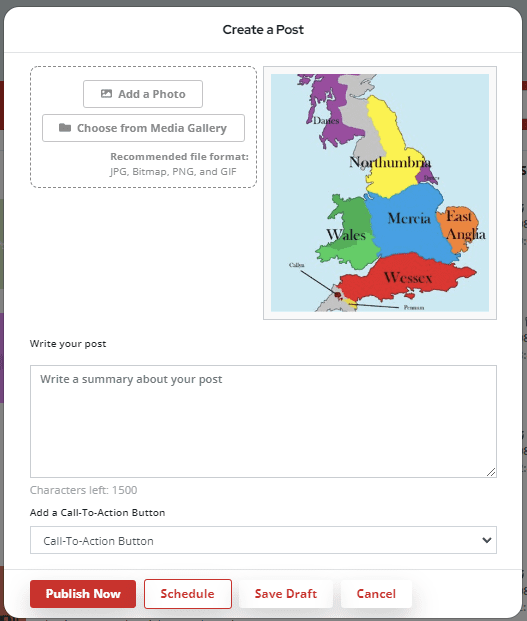
In order to create a post, simply click the “Create Posts” button.
We recommend adding a photo to each of your posts because it attracts more clicks and views from potential customers. Select on “Add a Photo” button in the first quadrant. In that same quadrant is where you can choose to add a photo from your Media Gallery. Please note the recommended file format for smoother processing of images.
Photo File Formats: JPEG, PNG, JPG
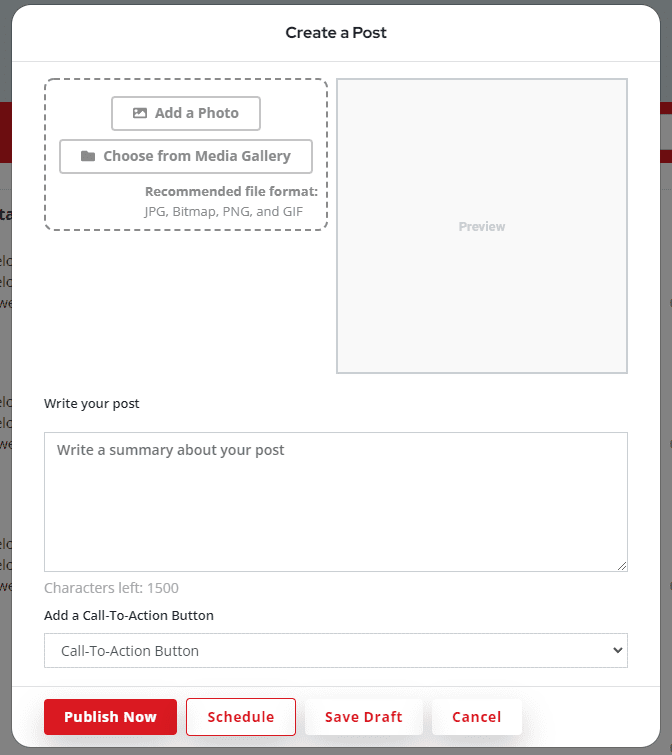
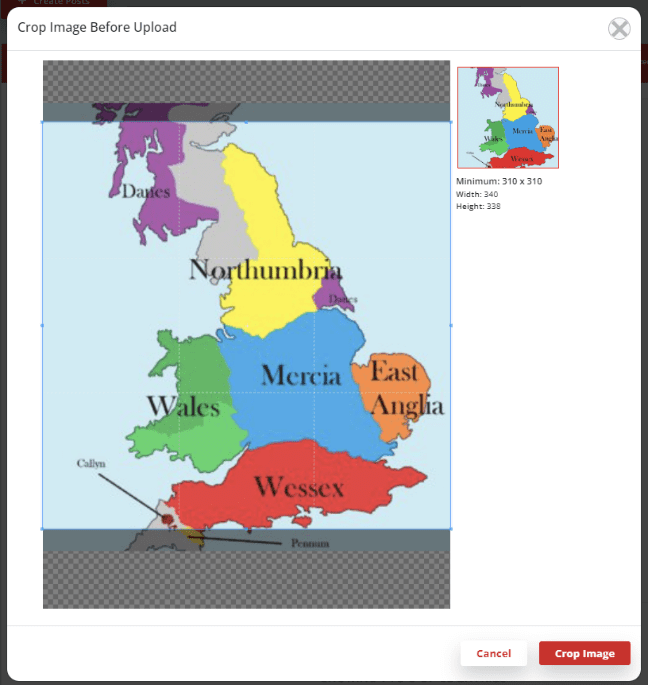
Simply Be Found made getting your desired photo dimensions easier through our cropping function. You can crop your desired image size before uploading it to your business profile.
4. Create A Post
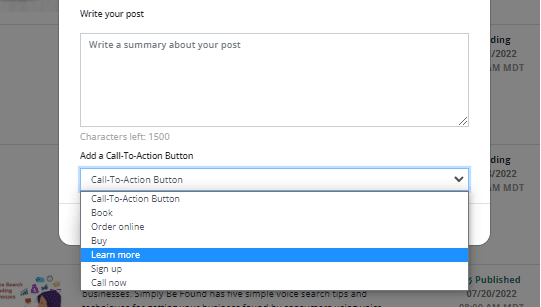
Simply Be Found allows you to choose one of our CTAs to offer your customers a cause to take action. You can choose the best CTA (call to action) based on what you want the consumer to do at a specific point in their journey to discovering your services and/or product.
- Book
- Order Online
- Buy
- Learn More
- Sign up
- Call now
After you’ve chosen the right CTA for your post, a text box will appear below where you can type in the URL to which you want your customers to be directed.
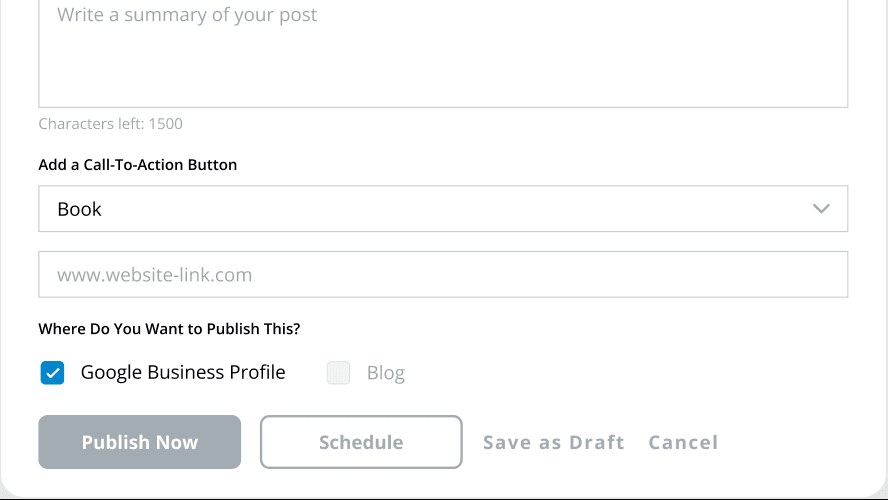
You can write a post with at least a 100–300-word summary or up to 1500 characters with relevant information about your local business.
If you want it to optimize for local search, you can add a location within your local community. You can also talk about what the attached photo is all about.
5. Schedule A Post
You can schedule your post to be uploaded immediately by clicking the “Publish Now” or schedule it based on your desired date and time. In order to do that, simply click the “Schedule” button and a calendar will pop up.
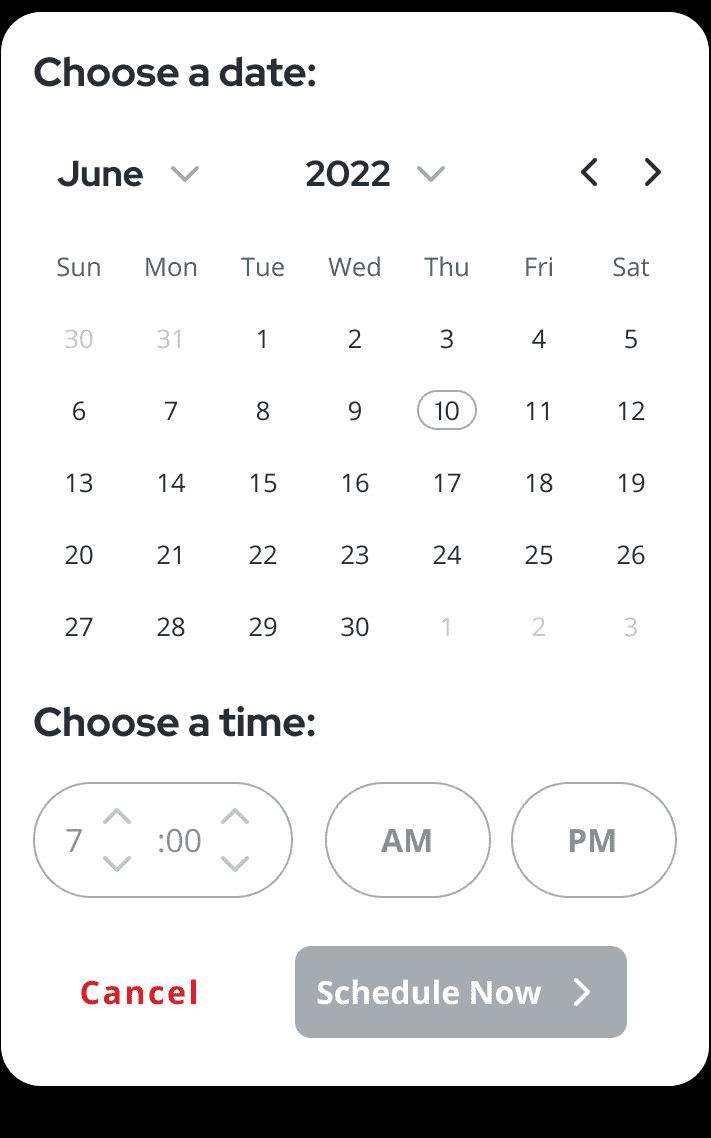
Here is what the calendar looks like for you to select the best date and time to schedule when you want your post published.
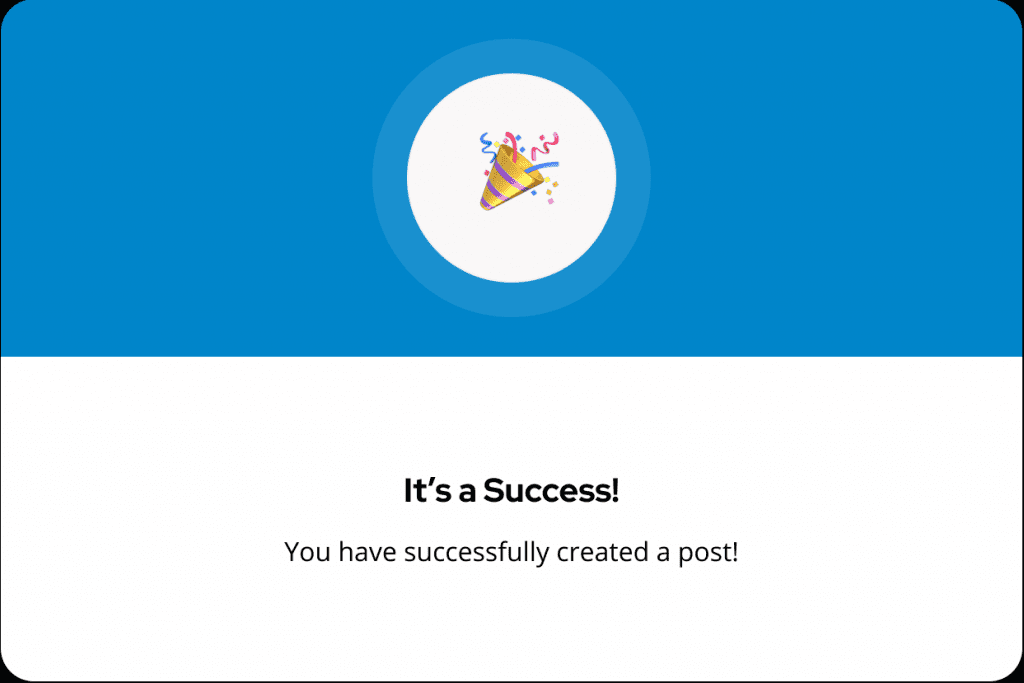
You should see this message to confirm that your post has been created and added to your Google Business Profile.
6. Check it On Your Business Profile
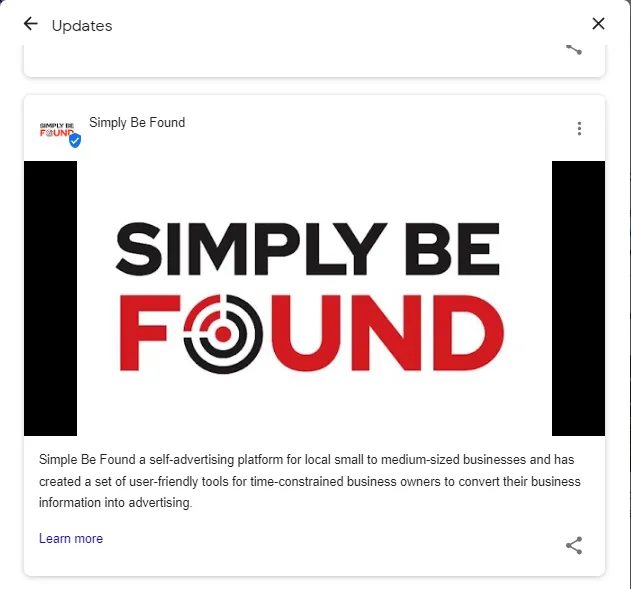
You can check the efficacy of Simply Be Found by creating a posts section by checking it on your Business Profile. Simply go to your local search and search for your business profile.
The published post will appear in the post section of your business profile. It may take a while to see updates on your posts; Google receives feeds from us twice a day.
Manage Your Time Effectively
Creating a post for your local business can be difficult. There are many factors to consider, such as when and where you should post, what images or videos to use, how long the content should be, etc.
The Simply Be Found platform simplifies this process by making it easy for anyone to create an effective post that will help grow their business in no time!
To know more, visit Simply Be Found.